Pdf Timestamp Server Url
Oct 03, 2018 Tools like Microsoft's SignTool let you time stamp the signature block based on the current date and time that a time stamping service provider, such as Comodo, provides. Finally, you bind the time stamped signature block to the original software. Now you can publish the signed software on your Web site for download. Timestamp server for Adobe Acrobat. Please try this free online unix timestamp creator, you can get the current time stamp. Reply Delete. ABOUT ENTRUST DATACARD CORPORATION. Consumers, citizens and employees increasingly expect anywhere-anytime experiences—whether they are making purchases, crossing borders, accessing e-gov services or logging onto corporate networks.
A certificate-based signature,like a conventional handwritten signature, identifies the personsigning a document. Unlike a handwritten signature, a certificate-basedsignature is difficult to forge because it contains encrypted information thatis unique to the signer. It can be easily verified and informs recipients whetherthe document was modified after the signer initially signed the document.
To sign a document with a certificate-based signature, you mustobtain a digital ID or create a self-signed digital ID in Acrobator Adobe Reader. The digital ID containsa private key and a certificate with a public key and more. Theprivate key is used to create the certificate-based signature. Thecertificate is a credential that is automatically applied to thesigned document. The signature is verified when recipients openthe document.
When you apply a certificate-based signature, Acrobat uses a hashing algorithm to generatea message digest, which it encrypts using your private key. Acrobatembeds the encrypted message digest in the PDF, certificate details, signatureimage, and a version of the document when it was signed.
The Sign > Work with Certificates panel lets you applytwo types of certificate-based signatures. You can certify a documentattest to its content or approve a document with the Sign With Certificateoption.
Certify options provide a higher level of document controlthan Sign With Certificate. For documents that require certification,you must certify the documents before others sign them. If a documenthas already been signed, the Certify options are disabled. Whenyou certify a document, you can control the types of changes otherpeople can make. You can certify with or without displaying a signature.
When you sign with a certificate, the signature is consideredan approval signature.
Signatures made with the Certify or Sign With Certificate optionscomply with data protection standards specified by the EuropeanTelecommunications Standards Institute (ETSI). In addition,both signature types comply with the PDF Advanced Electronic Signature(PAdES) standard. Acrobat and Reader provide an option to changethe default signing format to a CAdES format. This option is compliantwith Part 3 of the PAdES standard. The timestamp capability and nativesupport for long-term validation of signatures (introduced in Acrobat9.1) is in compliance with Part 4 of the PAdES standard. The defaultsigning format, when set up accordingly, is compliant with Part2 of the PAdES standard. You can change the default signing methodor format, in the Signatures panel of the Preferences dialog box.Under Creation & Appearance, click More.
You can expedite the signing process and optimize yourresults by making the following preparations in advance.
Note:
Some situations require using particular digital IDs for signing. For example, a corporation or government agency can require individuals to use only digital IDs issued by that agency to sign official documents. Inquire about the digital signature policies of your organization to determine the appropriate source of your digital ID.
Get a digital ID from your own organization, buy a digital ID (see the Adobe website for security partners), or create a self-signed one. See Create a self-signed digital ID. You can’t apply a certificate-based signature without a digital id.
- Set the default signing method.
- Create an appearance for your certificate-based signature. (See Create the signature appearance.)
- Usethe Preview Document mode to suppress any dynamic content that can alter the appearance of the document and mislead you into signing an unsuitable document. For information about using the Preview Document mode, see Sign in Preview Document mode.
- Review all the pages in a document before you sign. Documents can contain signature fields on multiple pages.
- Configure the signing application. Both authors and signers should configure their application environment. (See Set signing preferences.)
For details on the full range of configuration options in enterprise settings, see the Digital Signatures Guide.
- Choose a signature type. Learn about approval and certification signatures to determine the type you should choose to sign your document. (See Signature types.)
Signing workflow preferences control what you can see and do when the signing dialog box opens. You can allow certain actions, hide and display data fields, and change how content affects the signing process. Setting signing preferences impacts your ability to see what you are signing. For information on the available signing preferences, see “Signing Workflow Preferences” in the Digital Signature Guide at www.adobe.com/go/learn_acr_security_en.
Customizing signature workflowsusing seed values
Seed values offer additionalcontrol to document authors by letting them specify which choicessigners can make when signing a document. By applying seed valuesto signature fields in unsigned PDFs, authors can customize optionsand automate tasks. They can also specify signature requirementsfor items such as certificates and timestamp servers. For more informationabout customizing signatures using seed values, see the Digital Signature Guide (PDF)at www.adobe.com/go/learn_acr_security_en.
Create the appearance of a certificate-basedsignature
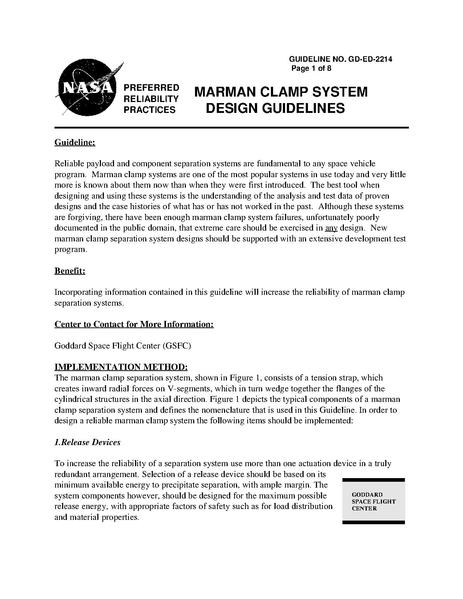
You determine the look of your certificate-based signature by selecting options in the Signatures panel of the Preferences dialog box. For example, you can include an image of your handwritten signature, a company logo, or a photograph. You can also create different signatures for different purposes. For some, you can provide a greater level of detail.
A signature can also include information that helps others verify your
A. Text signature B. Graphicsignature
- (Optional) If you want to include an image ofyour handwritten signature in the certificate-based signature, scanyour signature, and save it as an image file. Place the image ina document by itself, and convert the document to PDF.
Right-click the signature field, and select Sign Document or Certify With Visible Signature.
Note:
You can also create an appearance usingthe Signature preferences: Edit > Preferences > Signatures(Windows) or Acrobat > Preferences > Signatures (Mac OS).
From the Appearance menu in the Sign dialog box, select Create New Appearance.
- In the Configure Signature Appearance dialog box, typea name for the signature you’re creating. When you sign, you selectthe signature by this name. Therefore, use a short, descriptivetitle.
Displays only the default icon and other informationspecified in the Configure Text section.
Displays an image with your certificate-based signature. Selectthis option to include an image of your handwritten signature. Toimport the image file, click File, click Browse, and then selectthe image file.
Displays only the default signature icon and your nameas it appears in your digital ID file.
Seth Klarman’s Margin of Safety provides “Risk-Averse Value Investing Strategies for the Thoughtful Investor. While Margin of Safety is sure to cost you thousands of dollars if you buy it online, there are tons of Margin of Safety PDF Downloads and notes available free on the internet. Below are some of my favourite excerpts from Margin of Safety, and related Seth Klarman investing material.
- For Configure Text, select the options that you wantto appear in the signature. Distinguished Name shows the user attributesdefined in your digital ID, including your name, organization, andcountry.
For Text Properties, specify the writing direction and type of digits used, and then click OK. See also Enable right-to-left languages.
- (Optional) If the dialog box includes the AdditionalSignature Information section, specify the reason for signing thedocument, the location, and your contact information. These optionsare available only if you set them as your preferences in the Creationand Appearance Preferences dialog box (Edit > Preferences >Signatures > Creation & Appearance > More).
A roaming ID isa digital ID that is stored on a server and can be accessed by the subscriber.You must have an Internet connection to access a roaming ID andan account from an organization that supplies roaming digital IDs.
- Expand Digital IDs on the left,select Roaming ID Accounts, and click Add Account.
- Type the name and URL for the roaming ID server, andclick Next.
- Type your user name and password or follow the directionsto create an account. Click Next, and thenclick Finish.
Once the roaming ID is added, it can be used for signingor encryption. When you perform a task that uses your roaming ID,you’re automatically logged in to the roaming ID server if yourauthentication assertion hasn’t expired.
You can have multiple digital IDs that you use for differentpurposes, particularly if you sign documents in different rolesor using different certification methods. Digital IDs areusually password protected. They can be stored on your computer inPKCS #12 file format. Digital IDs can alsobe stored on a smart card, hardware token, or in the Windows certificatestore. Roaming IDs can be stored on a server. Acrobat includes a default signaturehandler that can access digital IDs from various locations. Registerthe digital ID in Acrobat for it to be availablefor use.
Directoryservers are commonly used as centralized repositories of identities withinan organization. The server acts as an ideal location to store usercertificates in enterprises that use certificate encryption. Directoryservers let you locate certificates from network servers, including LightweightDirectory Access Protocol (LDAP) servers. After youlocate a certificate, you can add it to your list of trusted identitiesso that you don’t have to look it up again. By developing a storagearea for trusted certificates, you or a member of your workgroupcan facilitate the use of encryption in the workgroup.
For more information about directory servers, see the DigitalSignature Guide (PDF) at www.adobe.com/go/learn_acr_security_en.
You import directory server settings usingsecurity import/export methodology or a security settings file.Before, you import settings in a file using import/export methodology,ensure that you trust the file provider before opening it.
- Select Directory Servers on theleft, and then click Import.
- Select the import/export methodology file, and click Open.
- If the file is signed, click the SignatureProperties button to check the current signature status.
The directory server appears in the SecuritySettings dialog box.
Although it is preferable to export securitysettings, you can export directory settings as an import/exportmethodology file. Use the file to configure the directory serveron another computer.
- Enter your name, organization, and email address to createyour profile.
- Select Directory Servers on theleft, and then select one or more servers on the right.
- Click Export, select a destination,and click Next.
- To prove that the file came from you, click Sign,add your signature, and then click Next.
To save the file, specify its name and location, and click Save.
To send the file as an email attachment, type an email address in the To box, click Next, and then click Finish.
You can include the dateand time you signed the document as part of your certificate-basedsignature. Timestamps are easier to verify when they are associatedwith a trusted timestamp authority certificate. A timestamp helpsto establish when you signed the document and reduces the chancesof an invalid signature. You can obtain a timestamp from a third-partytimestamp authority or the certificate authority that issued yourdigital ID.
Timestamps appear in the signature field and inthe Signature Properties dialog box. If atimestamp server is configured, the timestamp appears in the Date/Time tabof the Signature Properties dialog box. Ifno timestamp server is configured, the signatures field displaysthe local time of the computer at the moment of signing.
Note:
Ifyou did not embed a timestamp when you signed the document, youcan add one later to your signature. (See Establishlong-term signature validation.) A timestamp applied aftersigning a document uses the time provided by the timestamp server.
To configure a timestamp server, you needthe server name and the URL, which you can obtain from an administratoror a security settings file.
If you have a security settingsfile, install it and don’t use the following instructions for configuringa server. Ensure that you obtained the security settings file froma trusted source. Don’t install it without checking with your systemadministration or IT department.
If you have an import/export methodology file with the timestamp server settings, click the Import button . Select the file, and click Open.
If you have a URL for the timestamp server, click the New button . Type a name, and then type the server URL. Specify whether the server requires a username and password, and then click OK.
To be able to use a timestamp server to timestampsignatures, set it as the default server.
- Select the timestamp server, and click the SetDefault button .
Adobe LiveCycle Rights Management(ALCRM) servers
Free Timestamp Server
Adobe LiveCycleRightsManagement (ALCRM) servers let you define centralized policiesto control access to documents. The policies are stored on the ALCRM server.You require server access to use them.
Microsoft Timestamp Server Url
ALCRM servers embed user access information in documents. Therefore,specify document recipients in ALCRM policies. Alternatively, letthe ALCRM server retrieve the list of recipients from LDAP directories.
Use ALCRM servers to set permissions for separate document tasks,for example opening, editing, and printing. You can also definedocument auditing policies on ALCRM servers.
More like this
Twitter™ and Facebook posts are not covered under the terms of Creative Commons.
Pdf Timestamp Server Url Search
Legal Notices Online Privacy Policy